:

Thursday, June 30, 2011

New Card... Step by step pics and a new tutorial coming soon :)


Hello Scrap-Friends I made a quick tutorial for this card not as detailed as the red one I will be posting later (still typing it out) Hope you enjoy it :)


1. Starting with a white piece of Cardstock cut to size (depending on the envelope or size you want) Score down the middle for a nice crisp fold and Fold

2. I chose an accent paper from Pink Paislee-  Daydream from the 365* degrees collection then cut out a square smaller than my card so that I wouold have a border of white around it. (about 1 cm off each edge)
3.I inked the edges white and then inked the edges of the white card blue and adhered the two centering the blue paper

4. I then cut out a skinny strip from the white cs and inked it and placed it across the middle of the blue paper. I took an orange journaling box from the same collection and Inked it in blue and placed it in the center of the card. (pic coming)

5. Take two small fabric flowers and placed them in the corner of the journaling box


6. Take two blue Prima flowers and placed those on top
7. Now fill the centers with a flower center, I used orange rhinestones to match the Journaling spot.
8.Next I cut out a say it in pearls design and place part of it across the bottom of the journaling spot coming from the lowest flower

9.  Add a second swirl to the top of that same flower creating an tilted corner
10. fill the bottom corner with pearl swirls any left overs from the design.

11. Stamp and fill a title or add a quote, rubon etc.  Easy as 1, 2, 11 ;)


;

Wednesday, June 15, 2011

Sew Easy giveaway -WINNER

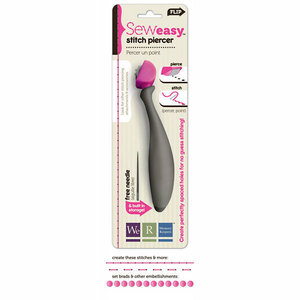
Ok It's officially giveaway time! I am really excited about giving away a brand new Sew easy because I love mines so much! It really helps, I did a review on it before and now i'm giving one away. If you are a follower of my Blog, All you have to do is leave a comment below telling me something that makes your life so easy. You have until Friday at 11:59pm to enter and I will announce a winner Saturday! If you enter Please check back Saturday, so you can send me your addy ASAP :) Good Luck!
Update: I used random.org and It Picked #1 congrats to Janet. Please Email your address to shaylacreations@yahoo.com Thank you all for playing! Keep watching you know I love my giveaways :)

Trinket box


Thursday, June 9, 2011

So sorry I've been neglecting you!

Hello My faithful blog followers, I am so sorry I've been neglecting you.. I've been crazy busy and then I took vacation (My brother graduated from HS!) but I am back and In true Shayla style I come with a giveaway! Stay tuned but I will tell you a brand new sew easy is involved.

Card I Made for a Friend..


It was hard to get a good pic of it, I am working on a light box for future use.

Thursday, March 24, 2011

Same scrappy to do list...for Two years...

Yes, you read the title right I've had the same scrappy to do list for TWO years!
For some reason I can't just finish off my kids baby books.. I have all the pictures, the pp and books, I just find myself staring at the pics and unable to scrap. When I do get around to scrapping it takes me forever and then It's just one or two pages till I am off scrapping something else. Is this some weird way of me holding on to the baby stages? Or am I putting to much pressure on myself to make the baby books perfect? Whatever it is It has kept finish baby books on my to do list for the last 2 years!

So now it's your turn, What are some things you just can't seem to sit down and do?

Thursday, March 17, 2011

St. Patty's day Giveaway!!

I feel so lucky to have a wonderful hubby and two awesome little boys. I am also lucky I have so many fun scrap goodies, Scrap stores and All of my wonderful followers. :)

So now it's your turn, tell me what makes you feel lucky and you may win this... treasure chest not included lol, drawing will be tomorrow afternoon.

Sunday, March 13, 2011

Chipboard Mini album tutorial

 I made a mini album for My Mil's birthday and actually took pics as I went along. Please excuse the quality of the pics, It was hard to take the pics and show what I was doing. Next time I will have help.  Hopefully this is a helpful tutorial.. feedback is always appreciated :) This is just for the cover page, the rest will be posted after she receives the book but you can see it in my gallery at Acot.


OK first I started with a Bare elements chipboard album (by creative imaginations)
17079l.jpgI traced the chipboard page on the back of the pp I wanted to use. I chose one that had a frog on it by colorbox (MIL loves frogs) ( TIP: be sure to place the side you are going to cover facing down on the back of the pp) I then removed the chipboard page.

I cut out the paper and adhered it to the chipboard page, using Aileen's tacky glue. I then took a piece of brown card stock and lined it up on the front so I could see how far I wanted it to go.
I marked the place and then flipped it over so I could trace just the top portion onto the brown cs.
I removed the book and cut out the brown cs
Next using adhesive of your choice ( you can use any scrapbooking adhesive for this part, I used my ATG gun) Place the topper down on your page.

Next flip it over and punch Holes directly through the chipboard holes. ( you want to do this before you cover the back  with paper to make sure you don't cover them.)
Now you can cover the back of this page the same way.

Now for those slightly uneven or rough edges I like to sand them and ink just to give it a nice look.  This is all about your comfort and style so You can easily skip this step.

Once both sides are covered you can add large eyelets (make sure your ring fits through before you attach them) I used my CAD 2 just because It was close but my smaller pink one works just as well.
Next I Placed ribbon across the front I like the brown cs peeking out at the bottom so I put it up higher.


I wanted more color so I added a multi color ribbon on top of the green..
now have fun and decorate with embellies... I added a Tim holtz journal ticket, a sassafras lass card (jungle bungle) and Layered 2 chipboard circles and placed a chip title across the front.
Now for the title, I like to add the title last just because it gives you the option to overlap embellies and make sure it stands out. I used a glitter rub-on.
  excuse the bad pics
You can repeat the steps above for each page decorating as you like.
and Here is the finished book. I will show the rest of the pages later, Acot ladies can see it in my gallery there.
Thanks for looking please leave a comment and let me know what you think of the book or tutorial. I appreciate any feedback :)

Edit to add the rest of the book now that MIL has recieved it :D


Sunday, March 6, 2011

Liebster Award!


Jazmine at Jazzys Cards awarded me the Liebster Award. I am excited and honored.

This award is one that you receive, but it is also an award that you give. If you receive a Liebster Blog Award you are asked to choose 3 other bloggers and send them one as well.
The criteria for giving the awards are simple. They go to bloggers who have fewer than 300 followers and who deserve recognition for a blog well done.


My three choices are:

1. Made by Shannon

2. scrappy go lucky

3. The Examined Life

I really think you will enjoy these ladies blogs so go check them out :) To me this is a wonderful way to show love and support for fellow bloggers. You guys ROCK! now lets keep the love going!